
qwen+Fastapi
qwen+Fastapi搭建本地知识库
参考链接:https://blog.csdn.net/xiaobing259/article/details/139998673
https://download.pytorch.org/whl/cu124/torch-2.4.1%2Bcu124-cp39-cp39-win_amd64.whl
https://www.bilibili.com/read/cv35427548/?jump_opus=1
内存不多,用这个qwen/Qwen2-7B-Instruct,差不多20G,2.5要百G,没那么多内存。。。
环境准备
创建虚环境
正好前面补充了虚环境的知识,这里我们直接创建一个.qwen的虚环境
python -m venv .qwen |

安装依赖
下面我们下载一下需要用到的包
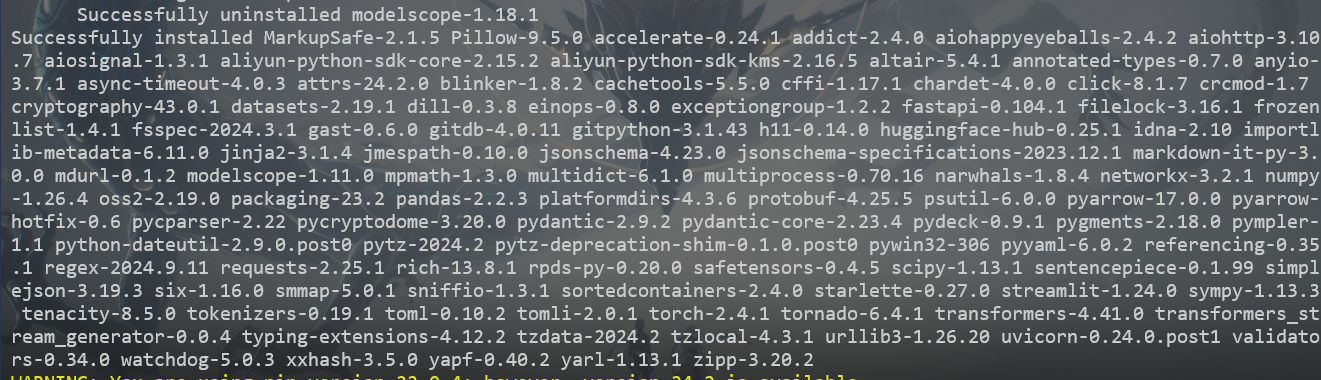
pip install fastapi==0.104.1 uvicorn==0.24.0.post1 requests==2.25.1 modelscope==1.11.0 transformers==4.41.0 streamlit==1.24.0 sentencepiece==0.1.99 accelerate==0.24.1 transformers_stream_generator==0.0.4 |
模型下载
这里用博主给的脚本,稍作修改即可,也可以用官网的教程下载https://modelscope.cn/models/Qwen/Qwen2-7B-Instruct/files
modelscope download --model Qwen/Qwen2-7B-Instruct |
但这个不会把文件保存到当前目录,用脚本可以指定缓存目录使用参考
import torch |
但不懂为什么下载会停住

看了下任务管理器,pyton还是有占用网络资源的的
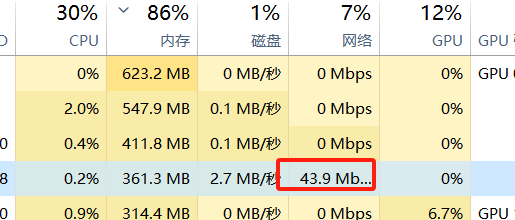
等了一会,进度条动了,所以遇到这种情况可以等一等,可能是还没显示

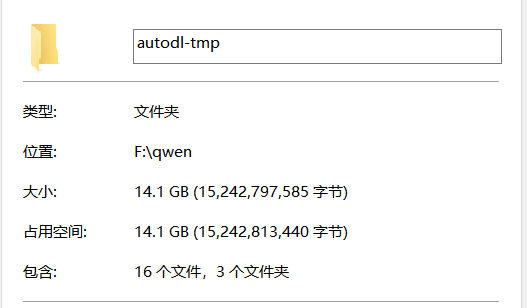
下载好后,大概有个15G左右
代码准备
安装fastapi库
https://fastapi.org.cn/tutorial/first-steps/
在./autodl-tmp路径下创建fastapi_Demo.py文件,编写FastAPI应用代码,用于加载模型并提供API服务
#encoding="utf-8" |
执行的时候可能会报错
Errot
AssertionError: Torch not compiled with CUDA enabled
https://blog.csdn.net/moyong1572/article/details/119438286
import torch |

False,说明当前的pytorch版本无法使用显卡,先安装cuda
- 查看自己显卡驱动程序的版本
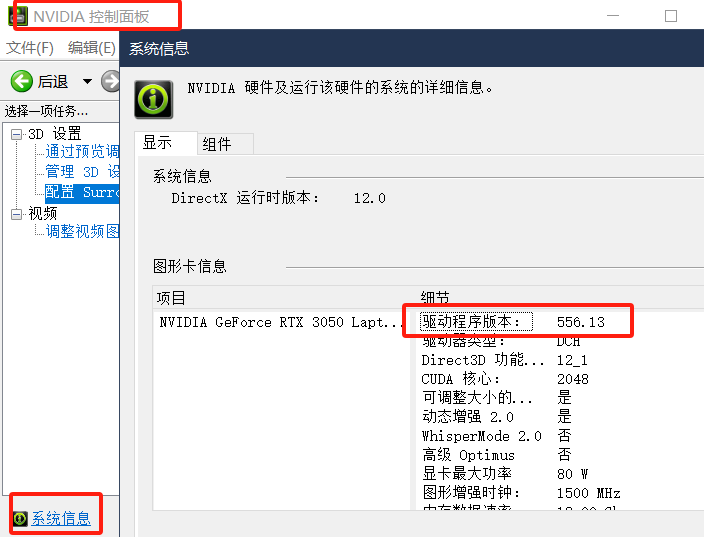
- 下载对应的cuda
查看需要下载的版本:https://docs.nvidia.com/cuda/cuda-toolkit-release-notes/index.html
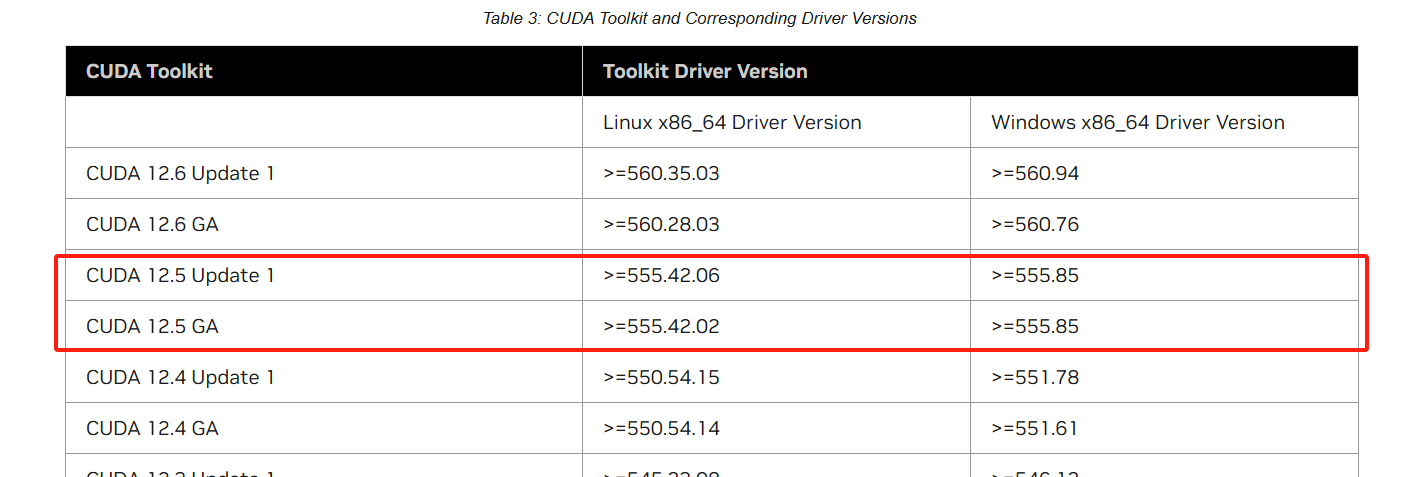
我们需要下载12.5的版本,但GA喝update有什么区别,搞不懂
下载地址:https://developer.nvidia.com/cuda-toolkit-archive

进入下载页面,选择对应的操作系统,中间有一步我选择local了,怕网络不好
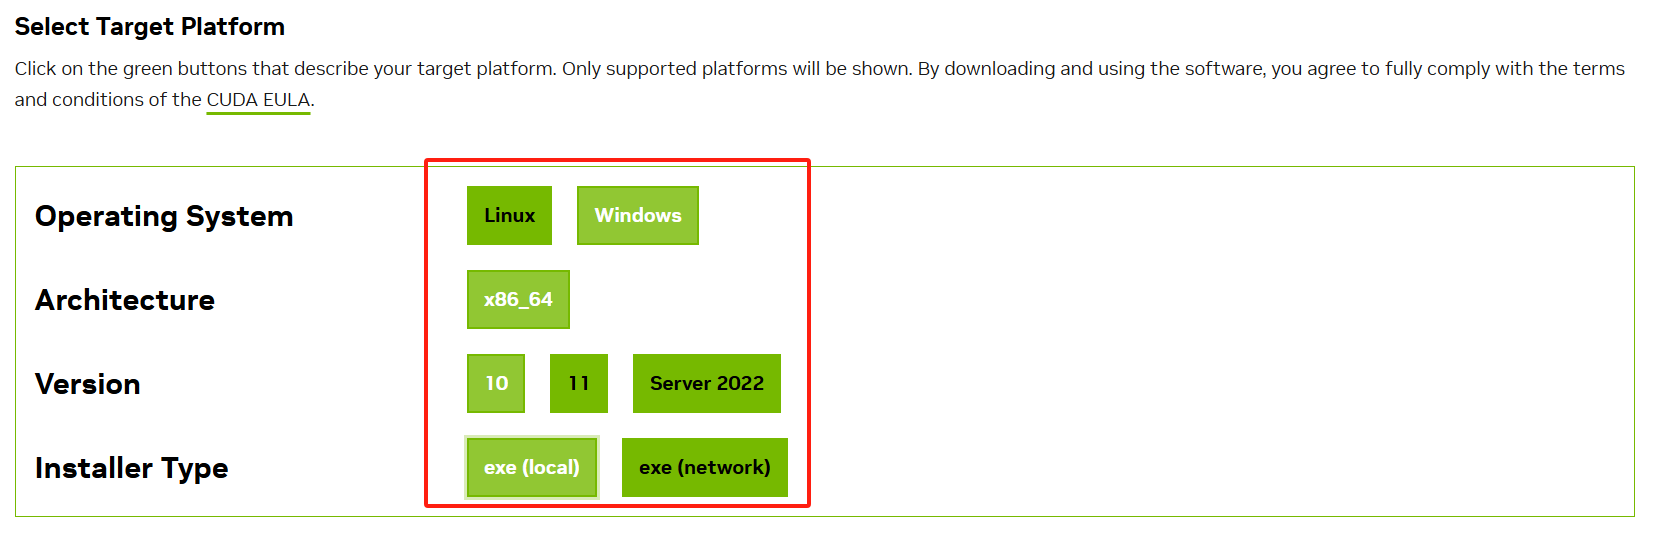
选完,这里会有对应的版本给你下载,这个下载指引挺有意思的
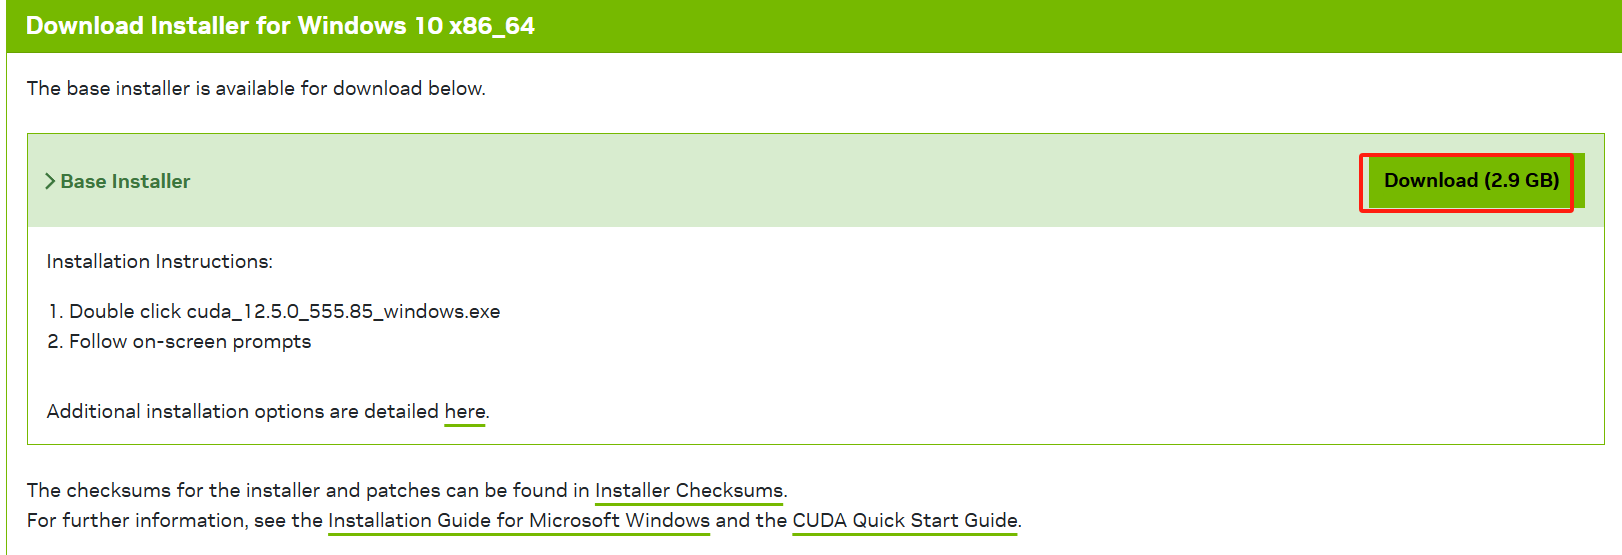
下载好后就可以安装了:https://blog.csdn.net/weixin_34409703/article/details/93226830
双击安装下载的.exe文件,然后选择解压路径,如下图,解压到哪里无所谓,安装成功会自动删除;
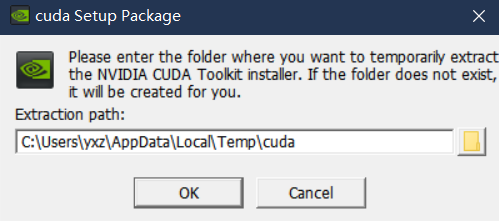
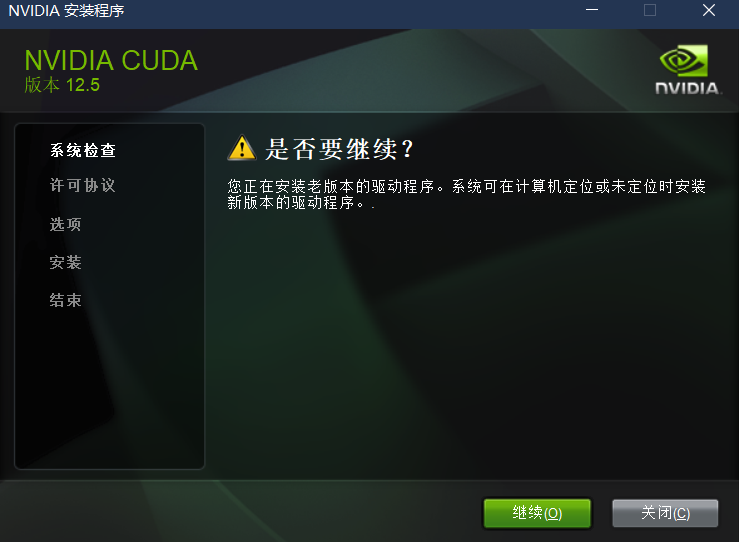
这里我先继续试试
解压完成后,得到如下图:
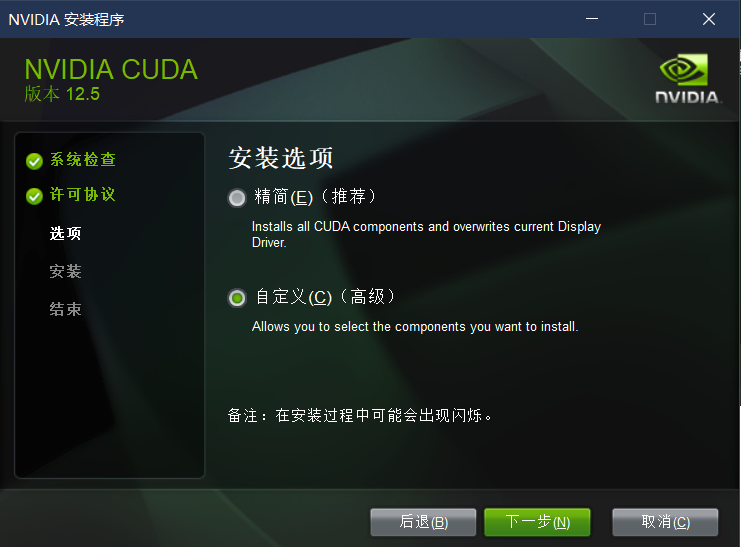
- 精简:安装所有CUDA模块,并覆盖掉当前的NVIDIA驱动程序;(说实话,容易出问题)
- 自定义:选择自己想要安装的模块,此处选择这里;
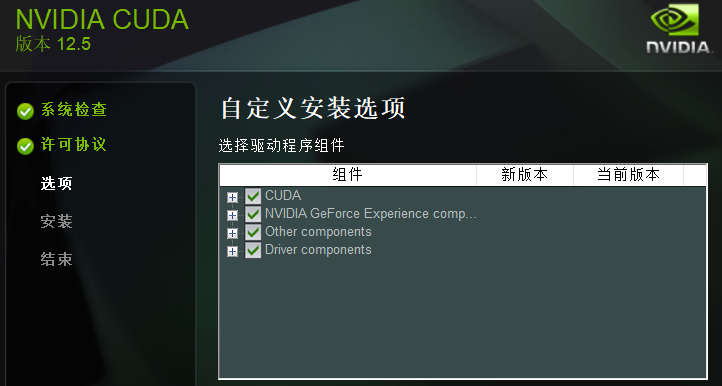
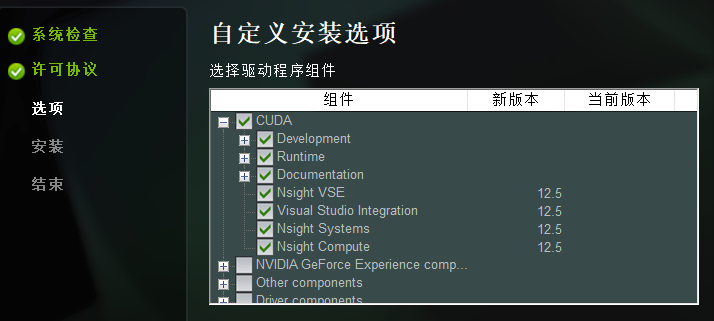
下面几个模块准确具体有什么用,不能100%确定,但能大概才出来:
- CUDA:这个是必须的,下面有CUDA Runntime、Samples一些东西;
- NVIDIA GeForce Experience:这个好像是为了更好的游戏体验,之前安装显卡驱动程序时也提示是否安装,果断拒绝了;
- Other components:这里的PhysX好像也是为了游戏体验来的;
- Driver components:这个就要慎重了,意思就是重新安装显卡驱动程序;如果之前已经成功安装驱动程序,这里就不用选了;如果之前没安装驱动程序,建议还是去官网上单独下载驱动程序进行安装吧
根据这个,我也是只保留了第一个选项
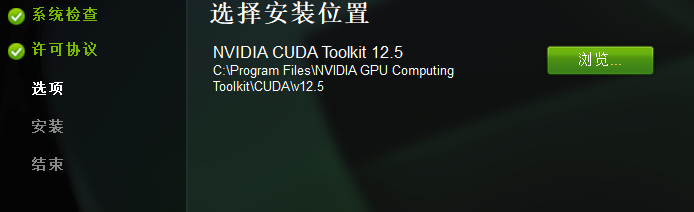
这里我修改到其它路径了,而且这里我只有一个选项。。。
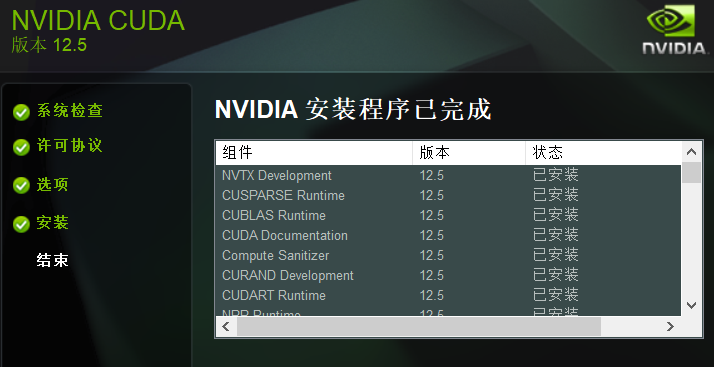
安装完成后配置一下环境变量
将F:/Nvida/lib/x64添加的系统变量的path中;
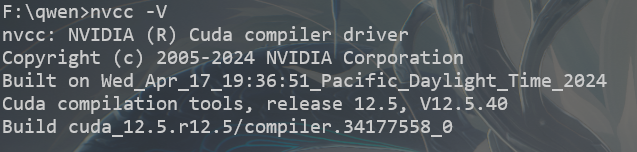
然后nvcc -V即可
- 还需要安装对应的CuDNN
下载网址 https://developer.nvidia.com/rdp/cudnn-archive
下载对应CUDA版本的CuDNN
下载完成后,解压得到一个名为cudnn-windows-x86_64-8.9.7.29_cuda12-archive的文件夹;
该文件夹下的文件复制到上一步安装的CUDA中;注意对应的文件夹;
./cuda/bin/.dll 复制到 ./NVIDIA GPU Computing Tookit/CUDA/v8.0/bin/
./cuda/include/.dll 复制到 ./NVIDIA GPU Computing Tookit/CUDA/v8.0/include/
./cuda/lib/x64/**.dll 复制到 ./NVIDIA GPU Computing Tookit/CUDA/v8.0/lib/x64/
这里根据实际情况来操作,cudnn就是原来的扩充,直接把对应的动态链接库dll,要包含的头文件*.h和要用的lib库,给补充到原拉的cuda中即可
安装好后测试Pytorch是否可以使用,运行刚刚的检查脚本,还是False/。。。
原文链接:https://blog.csdn.net/moyong1572/article/details/119438286
还有一种情况也会发生错误Torch not compiled with CUDA enabled,那就是安装的pytorch是cpu版本。。。
访问链接:https://pytorch.org/get-started/locally/#supported-windows-distributions,选择相应的版本
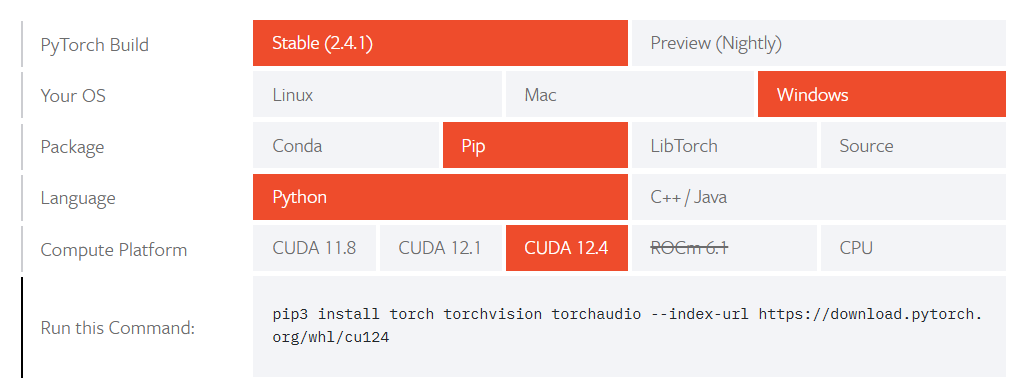
pip3 install torch torchvision torchaudio --index-url https://download.pytorch.org/whl/cu124 |
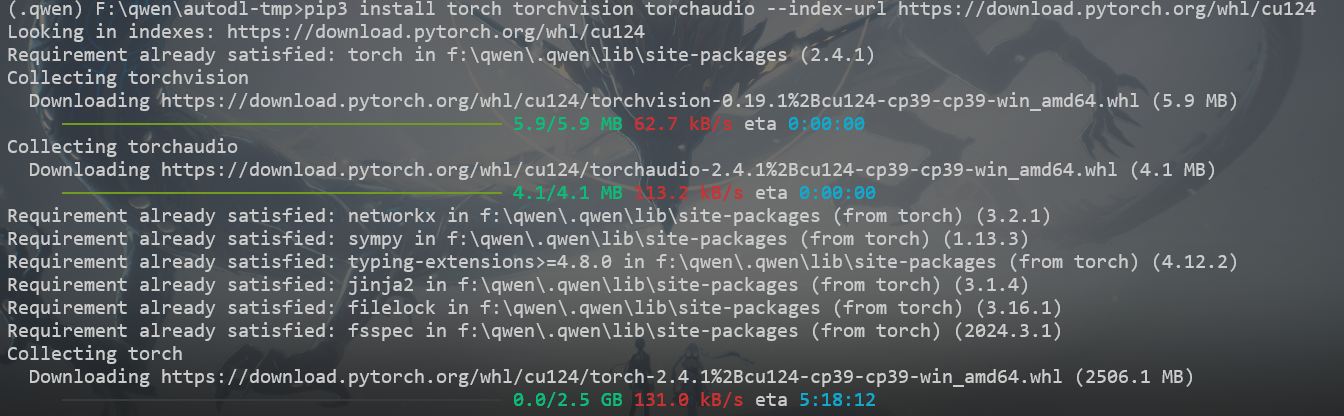
有点大啊,我看看能不能手动安装,复制下载链接,IDM+手动设置代理
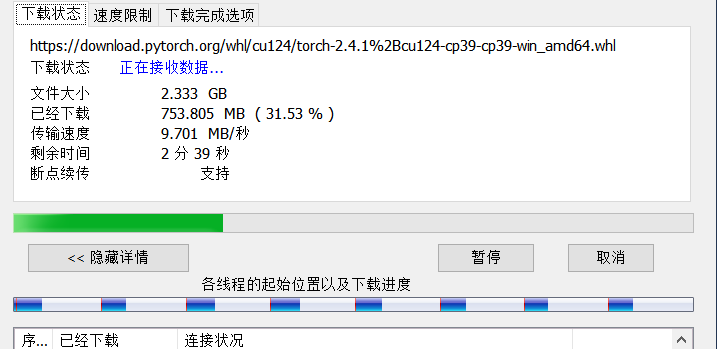
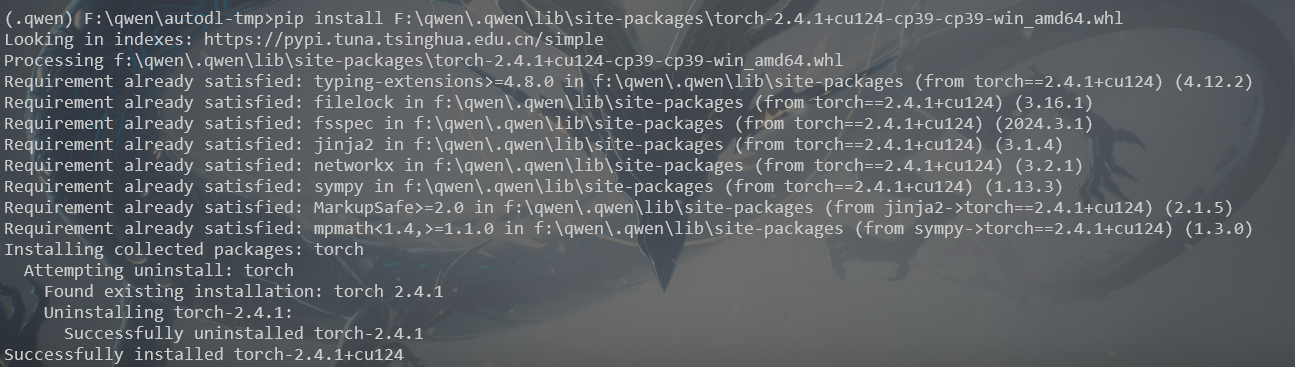
确实快的多,下载完放到相应的位置即可,就是大小有点对不上,他的2.5应该值得是解压后的,whl是一个压缩文件,下载好后,给他放到虚环境下的./qwen/Lib/site-packages,然后再pip一下
pip install F:\qwen\.qwen\lib\site-packages\torch-2.4.1+cu124-cp39-cp39-win_amd64.whl |
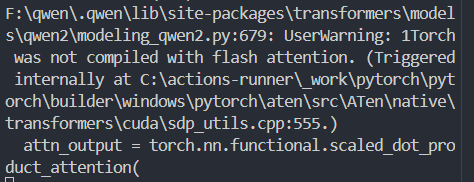
测试是否安装成功

但还是有问题
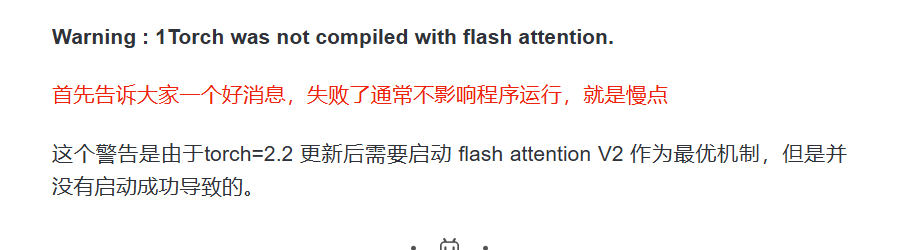
感觉靠谱i的解释如下,但这个慢点,好像慢的有点多

我试着换个版本
https://download.pytorch.org/whl/cu121/torch-2.1.2%2Bcu121-cp39-cp39-win_amd64.whl |
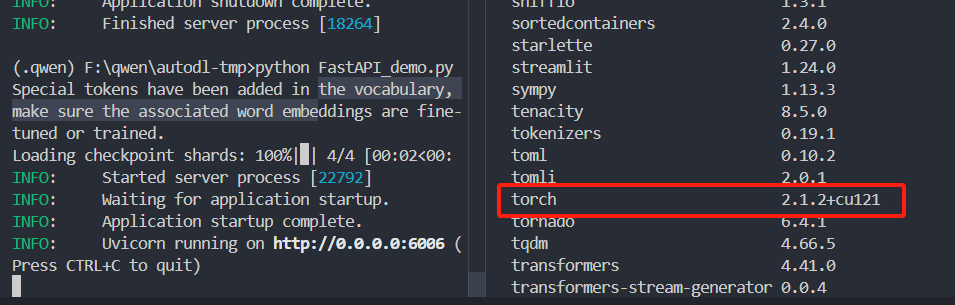
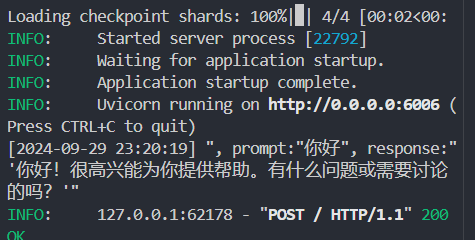
这次也是挺慢的,但没有报错了
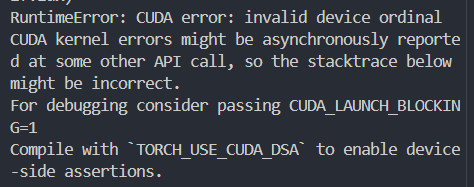
这个错误,DEVICE_ID得设置成0,https://blog.csdn.net/qq_38614074/article/details/139499410#:~:text=RuntimeErr